Avalanche Peak Track: The Best Day Hike in Arthur's Pass

One of the most challenging, but also one of the most rewarding hikes we've done in New Zealand was Avalanche Peak Track in Arthur's Pass on South Island. Read our hiking guide including tips on where to find the trailhead, where to stay, what to pack, what route to choose, what are the weather conditions, and information on how difficult is the trek, and how fit you have to be.
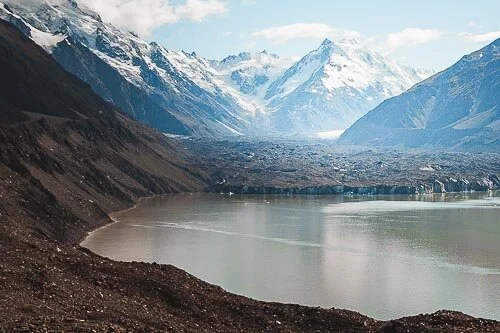
The Southern Alps. Majestic mountain range on New Zealand's South Island is one of the most beautiful places in the world.
At least for us, who love jagged snow-capped peaks and challenging climbs to the top of the mountains more than anything. It is worth to say that hiking in New Zealand is very rewarding, as amazing vistas, moody forests and turquoise lakes are usually not far away.
What we love the most about hiking in nature is that higher we go and more challenging the hike is, it is very likely that fewer people we meet along the way, and with fewer people we will at the end have to share the beauty.
It was exactly the case of Avalanche Peak.
We found Avalanche Peak Track in Arthur's National Park quite by an accident, but because we were in New Zealand for more than a year on Work and Travel Visas, we had plenty of time for exploring the country and decided to give this hike a chance.
Although this national park is not that often visited by foreign travelers (and when it is, it is usually visited on a day train trip from Christchurch), once we saw photos from the top of Avalanche Peak, and kea birds flying around, we knew this is exactly what we have to see by ourselves.
In this hiking guide we share with you everything you need to know before doing Avalanche Peak Track, tips on what you can expect, how's the track, advice on where to stay, what to pack, and how to find the trailhead.
Despite the elevation gain, the trek is really worthwhile, and we hope our photos will inspire you to put Arthur's National Park on your New Zealand itinerary, as there are more hiking trails than Avalanche Peak.

AVALANCHE PEAK TRACK LENGTH & DIFFICULTY
Avalanche Peak Track is not a somewhat long hike, it is only 2.5 kilometers one-way.
Before you start doing a happy dance, there is one thing you should know though.
Despite the horizontal distance is pretty short, on this trail between Arthur's Pass Village and the top of Avalanche Peak you will gain 1100 meters!
Yes, you read it right.
Hiking to the top of this mountain was one of the hardest ascends we've ever done not only in New Zealand but in general, and even though we usually think every trek is doable by averagely fit person, to successfully finish this hike, you must be either very persistent and super motivated, or you should be really fit.
We do not want to scare you off, but it is good to know what you are up to, and you should never underestimate the mountain.
People have died when attempting to get to the top of Avalanche Peak - some underestimated the extremely steep trail, some were caught by bad weather, which is another thing you should consider before climbing up, as it is an important factor to be successful and get back safely.
However, no worries.
We made it, and you will make it too.
The best views are those well deserved, right?
Travel Insurance
We never leave home without travel insurance that was designed to cover our expenses if something goes wrong during the trip.
Travel insurance protects against theft, flight delays, injury, illness, cancellations, and much more.
World Nomads provides travel insurance for travelers to cover their trip essentials, including sports and adventure activities.
SafetyWing is affordable travel insurance for backpackers, long-term travelers, and digital nomads.
Travel smarter and safer!

WEATHER IN ARTHUR'S PASS & AVALANCHE PEAK TRACK SAFETY
Weather in Arthur's Pass National Park can be very tricky, and as it is a major factor you should consider before you set off for Avalanche Peak, you must always check the forecast (the best thing to do is to visit Visitors Center in the village) and know your limits.
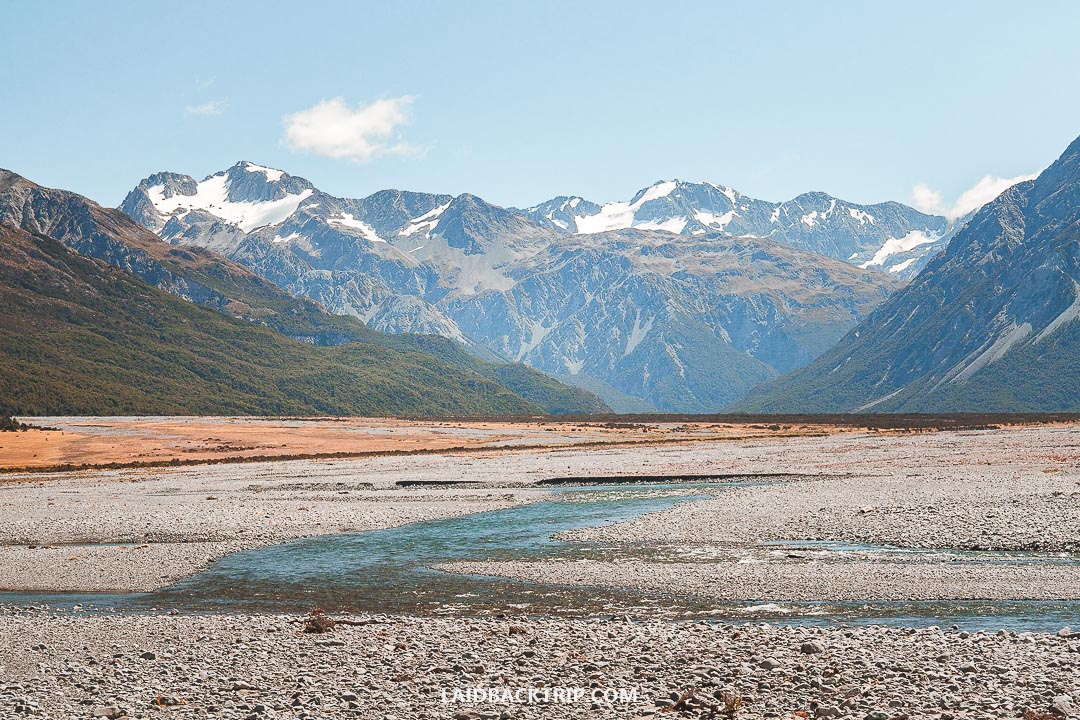
As the park is almost in the middle of Southern Alps, the weather conditions here are usually more severe than in the rest of the country.
In general, mountains in the area are colder, foggier, windier and wetter, and we do not even talk about the instability of the conditions. In case you have the perfect weather from the very morning (as we had), do not hesitate to start the hike as early as you can.
If you are not sure how the weather will turn during the day (which no one can know for sure), go to the visitor center first, listen to ranger's advice, and then be prepared to turn around in case the conditions get worse.
Summer and early autumn are the best seasons to hike to Avalanche Peak, and you also have the best chance to get the most stable weather.
Spring can be pretty rainy, and winter is really cold, with plenty of snow, low temperatures, and avalanche risk, so during winter months, only skilled and well-equipped mountaineers should attempt the climb.
There are several basic rules you should follow for your safety.
Always listen to your body and heart rate (know your limits), tell someone your plans, bring enough food, water, and extra layers, and never underestimate weather conditions. A big no is to start the hike in poor weather conditions.
The route is well-marked by colorful poles, but when the visibility is low, it is easy to get lost.
It is not worth it to put yourself in risk for beautiful views.
As it can start raining or get colder any time of the year, here are several essential things you should pack with you for this great one-day trip:
Hiking Boots | Daypack | Waterproof Jacket | Hiking Pants | Water Bottle
In case you plan on hiking Avalanche Peak Track in winter or early spring, you should carry an avalanche kit consisting of:

AVALANCHE PEAK TRACK TRAILHEAD & WHICH DIRECTION TO HIKE
There are two routes to Avalanche Peak, which is great, as you can make a loop if you want to, and not to return the same way.
In case you plan on doing round trip, it is recommended to start via Avalanche Peak Track and return via Scotts Track, if you want to walk in-out, or not sure you can make it to the top, it is better to do Scotts Track, because the climb from this side is a bit less steep, therefore easier.
Because the Avalanche Peak Route is steeper, it is better to return to the village via Scotts Track as descending will be safer and more gradual.
We opted for the loop, so we were looking for Avalanche Peak Track trailhead.
The trailhead is behind the Visitor Center, you must follow the bush edge for a couple of hundreds of meters northwards until you reach the start of the trail. In case you get to Glasgow Bridge over Avalanche Creek, it means you missed the trailhead, and have to walk back.
To find Scotts Track trailhead, walk approximately 700 meters west of the Visitors Center where you will find a sign announcing the beginning of the hike.

AVALANCHE PEAK TRACK DESCRIPTION
As we mentioned before, we planned to do the loop, so we started the hike via Avalanche Peak Track.
From the very beginning, the trail is marked by orange markers, so when the visibility is good, it is very easy to follow the path.
As the hike starts approximately 700 meters above sea level, and the top of Avalanche Peak is 1800 meters high, we started to gain elevation pretty quickly.
Actually, we were taken by surprise how the trail was steep.
The trail was rocky with some roots at times, and I must admit I do not remember much from this section, only that I was breathing heavily, sweating terribly and climbing the steep slope using my legs and hands simultaneously to move forward.
Later we found out we walked maybe quicker than we should have, because normally it takes to get to the top four hours, and we made it only two hours. Anyway.
After approximately one hour we emerged above bush line, where we took a break, met a group of Kiwis who showed us on their GPS watch how far we are, and then we continued.
The second part of the trail is marked by yellow poles, and the trail led us uphill through tussock, and subalpine vegetation.
The path in this section is not that inclined, and it also helped we finally got some views.
Make sure you follow the path and do not wander off as everywhere around are steep drops.
The final part of the hike was rocky, and we gained height in large steps until we reached the ridge, and from this point, it was approximately fifteen minutes to the top.
The views from the top of Avalanche Peak were magnificent, but we could not imagine climbing up in bad weather conditions.
We took a break and had to protect our food from intrusive kea birds (do not feed them). Once we gained some energy, we decided to return to Arthur's Pass Village. For the last part of the hike two treks - Avalanche Peak Track and Scotts Track joined, so we walked back the same way until we reached the intersection.
Scotts Track is marked by orange poles, and then leads off to the northeast towards Mount Cassidy.
The descend to the bush line should take you an hour, hour and a half, depending on your pace.
Be careful as it can be tricky to walk across large boulders and slippery rocks, especially when you will be tired by now.
Once you reach the bush line, marking changes into orange markers, and the descent is less steep, and in an hour, hour and a half you should be back in the Visitors Center.

FOOD & DRINK FOR AVALANCHE PEAK TRACK
As the one-day hike to the top and back can take you anything between five to eight hours, it is necessary to pack food and enough water to have enough energy for all day in the mountains.
We took 2.5 liters of water per person, and it was enough, maybe next time we would have taken soluble multivitamin C or something similar for better taste and the illusion of getting more energy from the water.
When it comes to food, take whatever you prefer eating on a day-long trek.
We usually took muesli, cheese, bananas, and also energy bars, nuts or chocolate bar to refill energy. You will carry all the equipment on your back, so it is important not to overpack.

WHERE TO STAY IN ARTHUR'S PASS
Arthur's Pass is a small village with only a few accommodation options, so in case you plan on staying here overnight, you should make your reservation well ahead as Avalanche Peak is one of many treks in the area, so you can easily spend here more than one day.
There are several cheaper DOC camps near Arthur's Pass (Klondyke Corner), but it means you must have either a tent or a campervan.
We share three best hotel choices close to the trailhead. In case Arthur's Pass is only a short stop on your itinerary, you can spend a night either in Christchurch or in Hokitika on the West Coast.
Budget | Arthur's Pass YHA - Really clean and tidy hostel with a social vibe, communal kitchen, and a lounge offers great comfort for all backpackers.
Mid-range | Arthur's Pass Alpine Motel - Cosy hotel, especially in the winter offers to travelers perfect service, access to all hiking trails, and the property is also close to a train station.
Luxury | Arthurs Pass Motel & Lodge - Beautifully furnished rooms are very comfortable, there is a kitchen available, and guests can enjoy amazing mountain views from a lounge.
Alternatively, search for your accommodation via Hostelworld.
HOW TO GET TO ARTHUR'S PASS
Despite its location right in the middle of South Island, Arthur's Pass is incredibly well accessible.
Although not many travelers decide to put hiking in the national park on the New Zealand itinerary, simply because there are so many treks and adrenaline activities to do in the country, that it is not possible to visit every single park or every single department, many people actually drive through Arthur's Pass National Park.
When traveling by rental car (which we recommend for exploring the country), this option will give you the opportunity to enjoy one of the most scenic drives in New Zealand which leads from Christchurch to the West Coast.
The only thing you have to do is follow Highway 73 which traverses the island from east to south.
When taking this route, make sure you will have several hours to spare for hiking Avalanche Peak Track.
But by far the most popular way how to visit Arthur's Pass National Park is taking the scenic TranzAlpine train from Christchurch to Arthur's Pass Village

This is a great opportunity to explore the national park and the amazing landscape of the Canterbury Plains and the Southern Alps for those who do not have either enough time or want to enjoy this exceptional activity.
It is true that when taking the train tour ride (unless you decide not to return to Christchurch), you won't have a chance to do the Avalanche Peak Track, but we could not leave out this transportation option as it is simply too well-rated.
In case you want to travel to Arthur's Pass by a regular train independently without returning to Christchurch, you can search for your tickets online.
If you are not traveling by rental car, no worries, several shuttle buses are connecting Greymouth (a city on the wild West Coast) and Christchurch, remember to make your reservation ahead, especially when traveling during winter as buses don't run when the demand is low, and also when the weather is bad.
Travel Resources
Here you can find links to all the travel resources we use and which you might find helpful when planning your next holiday.
Accommodation: When looking for accommodation, we usually search hotels via Booking.com or Hostelworld.
Tours: Although we love to travel independently, some places are better to visit with a guided tour.
We prefer GetYourGuide for its easy-to-use interface and solid reputation. Another great alternative is Viator.
Rental Cars: When going on a road trip, we always use Rentalcars.com, a reliable site for booking a rental car in advance.
Flight Tickets: When looking for flight tickets, you can search Skyscanner to find the best price.
Travel Insurance: World Nomads and SafetyWing cover against risks of travel.